
Your cart is empty Continue Shopping
Highland night sky stargazing tips for a proper dark‑sky night
Go in the period from early autumn to early spring, on a clear night near a new moon, and get yourself to a genuinely dark site. That’s the whole strategy. Everything else is detail.
- Dark site: a certified location, ideally one recognised by the International Dark‑Sky Association
- Clear sky: check the Met Office forecast, not just a general app
- Warm kit: more layers than you think you need
Expect a properly bright Milky Way on a good night. Expect the aurora to be a maybe, not a booking. Skyehighlandstours guides plan around the first two and treat the third as a bonus.
Key Takeaways
Successful Highland stargazing depends on choosing a dark, moonless winter night and being willing to relocate if local cloud rolls in.
| Point | Details |
|---|---|
| Best season | the autumn to early spring period avoids the summer “simmer dim” that ruins deep-sky viewing. |
| Moon phase matters | Plan around the new moon so faint Milky Way detail isn’t washed out. |
| Certified dark sites | Cairngorms, Tomintoul & Glenlivet, Isle of Rum and Stoer Observatory offer genuinely protected skies. |
| Aurora is a bonus | Treat the Northern Lights as unpredictable and plan the trip around the Milky Way instead. |
| Guided option | Skyehighlandstours private tours can add a stargazing stop with local site knowledge and transport. |
Table of Contents
- When to go: seasonality, moon phase and what you’ll actually see
- The best Highland dark‑sky sites and what to expect at each
- What to bring: clothing, light, optics and comfort
- Planning your night: weather, moon phase and a Plan B
- How to observe once you’re under a dark sky
- Night photography basics for the Highlands
- Safety, access and leave‑no‑trace etiquette
- Guided nights, observatories and local astronomy groups
- A local guide’s planning checklist
- Why patience beats gear every time
- How a guided Highlands tour takes the guesswork out of the night
- Sources
- FAQ
When to go: seasonality, moon phase and what you’ll actually see
Winter wins, and it isn’t close. From September through to March, Highland nights are long and dark enough for deep-sky detail to show properly, whereas high summer suffers from the “simmer dim”, the persistent northern twilight that never quite lets the sky go black, making proper deep-sky observation next to impossible.
Moon phase matters almost as much as season. A full moon washes out faint stars and the Milky Way’s dimmer structure, so plan around the new moon where you can, or at least a slim crescent.
Aurora is the trickiest promise to manage. It needs solar activity, clear northern skies, and darkness to align, so treat it as a lucky bonus rather than the plan itself, and enjoy the Milky Way and constellations as the main event.
Pro Tip: Check the Met Office’s specialist space‑weather pages before you leave the house. A “green” alert means don’t bother rearranging your evening for aurora; an “amber” or higher is worth watching.
The best Highland dark‑sky sites and what to expect at each
Scotland has some of the darkest, most protected skies in Europe, and a handful of sites carry formal recognition that guarantees minimal light pollution.
- Cairngorms Dark Sky Park (Tomintoul & Glenlivet): the Cairngorms Dark Sky Park runs a discovery centre and guided events with telescopes on hand, making it the easiest starting point for beginners who want structure rather than a blank moor.
- Isle of Rum: an International Dark Sky Sanctuary, among the most protected night skies anywhere in Scotland, though getting there means a ferry crossing and limited overnight options, so this suits a planned trip rather than a spontaneous evening.
- Stoer Observatory, Assynt: part of the Northwest Highlands, which sit among the darkest skies in Europe, with the observatory itself open roughly October to March.
- Galloway Forest Park: further south than the core Highlands, but VisitScotland rates it alongside Rum and Eigg as one of the country’s standout dark-sky destinations, useful context if you’re travelling from further afield.
If mobility is a factor, pick a car-accessible site like Tomintoul & Glenlivet over anywhere requiring a hike across open moorland in the dark.
What to bring: clothing, light, optics and comfort
Highland nights drop temperature fast once the sun’s gone, so pack as though you’re staying out far longer than planned, even for a two-hour session.
- Clothing: thermal base layers, a windproof and waterproof outer shell, insulated boots, a warm hat and gloves you can still operate a camera in.
- Seating and warmth: a foam mat or folding chair, plus a sleeping bag if you’re settling in for hours rather than minutes.
- Lighting: a red-light headtorch to protect your night vision, spare batteries, and a normal white torch for walking back to the car safely.
- Optics: 10×50 binoculars are the best value starting point; a small refractor or compact telescope adds detail without the bulk of a full rig.
- Power and dew: a portable power bank for phones and cameras, plus a dew band or chemical handwarmers wrapped round the lens or eyepiece to stop condensation ruining your view.
Field guidance from Highland astrophotographers backs this up almost item for item, right down to prioritising portable optics over anything heavy enough to discourage the walk in.
Pro Tip: Pack as if you might end up staying the whole night, even if you don’t plan to. The difference between a good session and a miserable, cut-short one is almost always a spare layer you didn’t think you’d need.
For a fuller list beyond stargazing kit, the Highlands packing checklist covers the wider trip essentials.
Planning your night: weather, moon phase and a Plan B
General weather apps are next to useless for stargazing because they don’t distinguish between high haze and genuine clear sky. Specialist tools like ClearOutside give a much more granular cloud-cover forecast built for astronomers, layered by altitude, which matters when a thin band of cloud can still wreck transparency.
- Check the Met Office for both general cloud cover and the space-weather forecast if you’re also chasing aurora.
- Cross-reference moon rise and set times against your planned window.
- Combine cloud forecasts with an aurora alert service so you’re not staring at cloud waiting for lights that were never coming.
- Always have a second location in mind. A nearby valley or higher ridge can be clear while your first choice is socked in fog.
That flexibility, more than any single gadget, tends to separate a wasted evening from a memorable one. Our guide on preparing for volatile Highland weather covers the same principle for daytime trips.
How to observe once you’re under a dark sky
Resist the urge to point anything at the sky the moment you arrive. Your eyes need twenty to thirty minutes in true darkness before they’re fully adapted, and that patience pays off in faint detail you’d otherwise miss entirely.
- Start naked-eye, letting your vision settle before reaching for optics.
- Sweep the Milky Way with binoculars to pick out denser star fields and open clusters.
- Learn basic star-hopping: use a bright, easy-to-find star as an anchor, then move short distances to fainter targets nearby.
- Use a simple app or printed chart to learn a handful of Highland-visible constellations rather than trying to memorise the whole sky at once.
- Check which planets are up that night; several are bright enough to spot with the naked eye once you know roughly where to look.
Pro Tip: Alternate between naked-eye, binoculars and any scope you’ve brought. Your eyes tire faster than you’d expect in the cold, and switching methods keeps them fresh for longer.
Night photography basics for the Highlands
You don’t need studio-grade gear to get a decent Milky Way shot, but you do need a tripod and a few settings dialled in correctly. Start wide: a wide-angle lens, aperture as open as it goes, ISO somewhere around 1600 to 3200, and a shutter speed capped at roughly 15 to 20 seconds to avoid visible star trails.
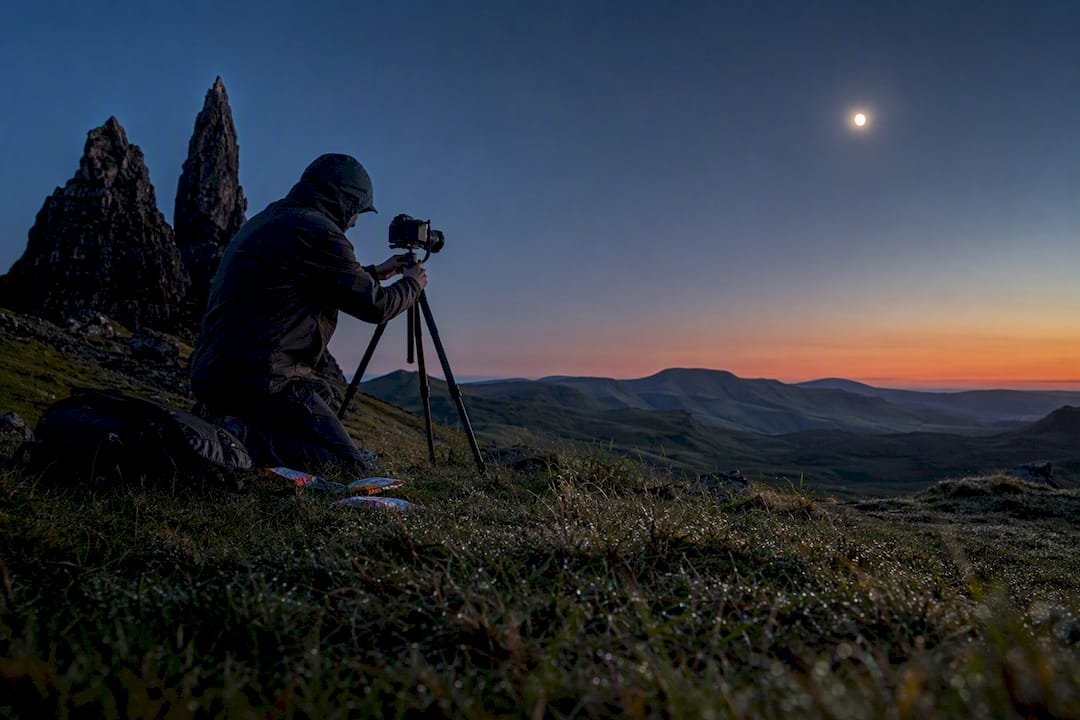
A remote shutter release or an intervalometer avoids camera shake from pressing the button by hand. Compose with something on the horizon, a ruined croft, a loch edge, a distinctive hill, so the shot isn’t just sky.
Dew is the silent killer of a good session. A dew band round the lens barrel, or a couple of handwarmers taped loosely on, stops the glass fogging over halfway through your exposures. Bring more battery than you think you’ll need; cold drains charge far faster than in daytime use.
Pro Tip: Apps like PhotoPills can tell you exactly where and when the Milky Way’s core will rise over a specific Highland location, saving you from setting up facing the wrong direction entirely.
Safety, access and leave‑no‑trace etiquette
The Highlands after dark are unforgiving of poor planning: boggy ground, sudden weather shifts and genuine cliff hazards don’t announce themselves the way they do in daylight. Follow the Scottish Outdoor Access Code principles for responsible wild camping and remote access, and always leave the site exactly as you found it, rubbish and all.
- Carry a headtorch, map or GPS, charged phone, and tell someone your exact route and expected return time.
- Check land access and observatory opening arrangements in advance; some sites need prior booking or permission.
- Watch for boggy terrain especially, since a hands-free red-light headlamp and a known route reduce the risk of a bad step in the dark considerably.
- Dress for temperatures well below what the daytime forecast suggested.
Guided nights, observatories and local astronomy groups
If you’d rather not plan every detail yourself, several Highland options put a telescope and an experienced eye between you and a blank sky. Cairngorms Dark Sky experiences at Tomintoul & Glenlivet run structured guided sessions with equipment provided. Stoer Observatory in Assynt offers observatory-based viewing through its open season. Community groups around Assynt and Caithness also run informal meet-ups worth checking for local events.
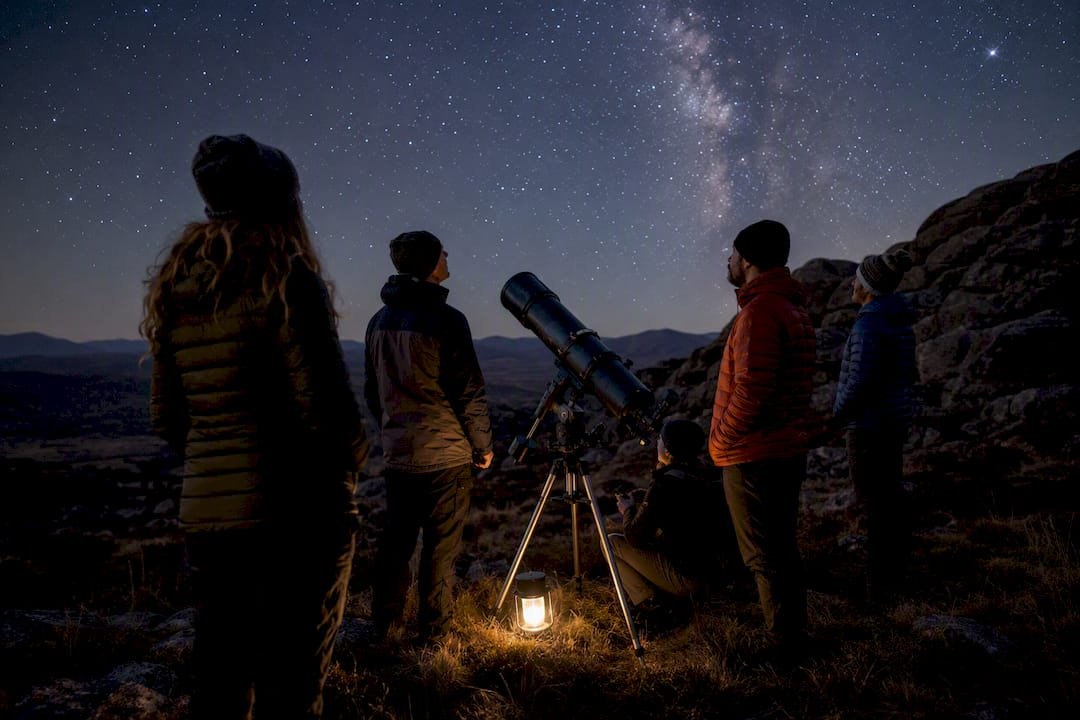
Guided sessions typically suit beginners, families, or anyone who wants mobile photography help without owning a telescope themselves. When choosing one, weigh up group size, what optics are actually provided, and how accessible the location is if walking any distance in the dark isn’t appealing.
A local guide’s planning checklist
Highland guides run through the same steps every time, long before a client arrives. Pre-trip: check the weather window and moon phase, test all gear at home, charge every battery, and, where possible, walk the route in daylight first so nothing’s a surprise after dark.
- On site: confirm horizon clearance for the direction you need, identify the nearest shelter, and brief the group on safety before anyone wanders off with a torch.
- Set telescopes up on stable, level ground away from foot traffic.
- Manage expectations early, particularly around aurora, which is never guaranteed regardless of forecast.
- Ask about mobility needs and photography goals before the group sets off, not once you’re standing in the dark.
Why patience beats gear every time
Most disappointing stargazing nights aren’t down to bad luck. They’re down to giving up too early, or refusing to drive twenty minutes to a clearer valley when the first spot clouds over. Skyehighlandstours guides build that flexibility into every private tour, because the sky rewards patience far more reliably than it rewards expensive optics.
How a guided Highlands tour takes the guesswork out of the night
Planning a stargazing trip solo means juggling weather apps, moon phase, site access and a cold car journey to somewhere you’ve never been in the dark. A private guided tour with Skyehighlandstours removes most of that friction: a local guide already knows which valley clears when the coast is cloudy, brings the transport to reach darker sites than most visitors would find alone, and handles the safety oversight that solo trips lack.

Whisky tours, family itineraries and full-day Highland routes can all include an evening stargazing stop where the weather and season line up. If you want a Highland night sky trip built around your dates rather than a forecast gamble, get in touch with Skyehighlandstours to check availability.
Sources
- BBC Sky at Night Magazine — What to take on a Highlands astronomy adventure
- Met Office — Specialist space‑weather forecasts
- International Dark‑Sky Association — All International Dark Sky Places
- Cairngorms Dark Sky Park — Dark sky experiences
- VisitScotland — Dark sky parks & stargazing in Scotland
FAQ
Can you see the Milky Way in the Scottish Highlands?
Yes, clearly, on a moonless night between September and March, away from towns and villages. Certified sites like the Cairngorms Dark Sky Park offer some of the best chances in the country.
What are the best tips for stargazing for beginners?
Pick a new moon, dress far warmer than feels necessary, and give your eyes twenty to thirty minutes to adjust before expecting to see faint detail. Starting naked-eye before reaching for binoculars makes the whole experience easier to follow.
What’s the worst time for stargazing?
High summer, thanks to the persistent Highland twilight known as the “simmer dim”, which never lets the sky get properly dark. A full moon at any time of year also washes out fainter stars and Milky Way detail.
When is the best time to see the Milky Way in Scotland?
During the darker months of the year, ideally around a new moon, when nights are long enough and dark enough for the galaxy’s structure to show clearly.
Do I need a telescope to enjoy Highland stargazing?
No. A pair of 10×50 binoculars covers most of what a beginner wants to see, and a private guided tour with Skyehighlandstours can supply telescopes and local expertise if you’d rather not buy your own.